Add a Flash Auction widget to your Shopify store in minutes! This guide walks you through each step—from copying the snippet to verifying it on your product pages—so you can display live auction info seamlessly. No coding experience? No problem. Just follow along carefully.
Now, let’s get started with the Steps:
Copy this exact snippet (you’ll paste it later):
<div class=”nex-auction”
data-product-id=”{{ product.id }}”
data-product-handle=”{{ product.handle }}”
data-variant-id=”{{ product.variants[0].id }}”>
</div>
Note: product.variants[0].id picks the first variant. If your theme uses a different variable for the displayed variant, use the theme’s variant variable instead.
2) Open the Shopify theme code editor
Login to Shopify → Online Store → Themes.
Find the theme copy you will edit → Actions → Edit code.
3) Locate the price block
In the left file list, search for price.liquid. If not found, search for filenames like product-price.liquid, price-item.liquid, product-card.liquid, card-product.liquid, or product-grid-item.liquid.
Open the file. You are looking for the block that renders the regular price — typically:
<div class=”price__regular”>
<span class=”visually-hidden visually-hidden–inline”>
{{ ‘products.product.price.regular_price’ | t }}
</span>
<span class=”price-item price-item–regular”>
{{ money_price }}
</span>
</div>
If you can’t find money_price exactly, look for price-item–regular, price, or product.price.
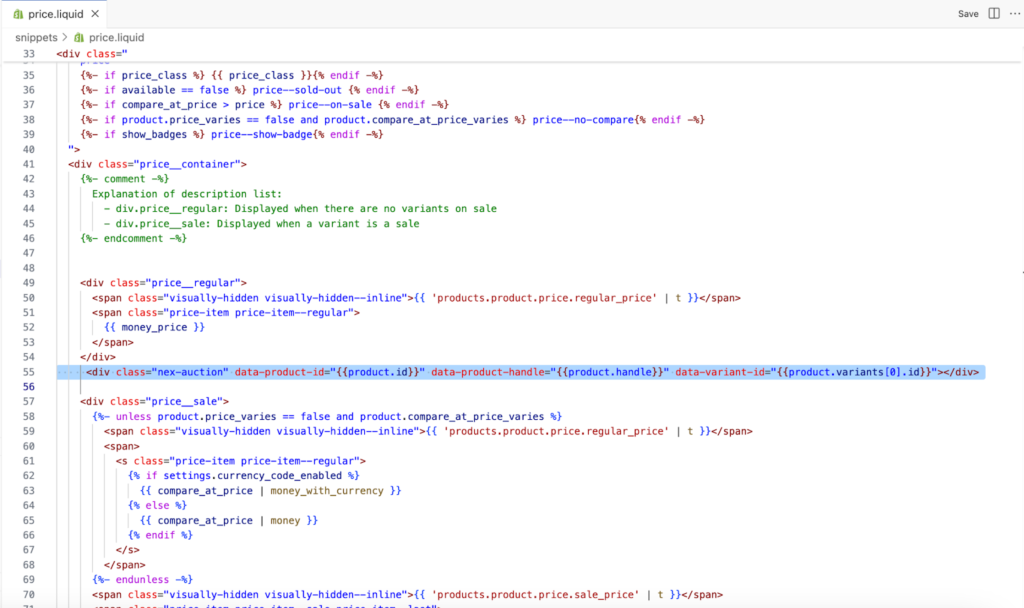
4) Paste the auction snippet
Place the cursor immediately after the closing </div> of the price block shown above.
Paste the auction snippet you copied in Step 1.
Example final layout:
<div class=”price__regular”>
<span class=”visually-hidden visually-hidden–inline”>
{{ ‘products.product.price.regular_price’ | t }}
</span>
<span class=”price-item price-item–regular”>
{{ money_price }}
</span>
</div>
<div class=”nex-auction”
data-product-id=”{{ product.id }}”
data-product-handle=”{{ product.handle }}”
data-variant-id=”{{ product.variants[0].id }}”>
</div>
<!– optionally continues with sale / compare price blocks –>
<div class=”price__sale”>
…
</div>
If your theme shows price code in multiple places (product card and product page), add the snippet to each place where you want auction info to appear.
5) Save & preview
Click Save in the code editor.
In the Themes screen, click Preview for the edited theme.
Open a collection page (or whichever page shows product cards).
Inspect one product card — you should see the <div class=”nex-auction” …> element in the product card HTML.
Quick verification (developer console)
Open DevTools (right-click → Inspect) and run in Console:
document.querySelectorAll(‘.nex-auction’).length
If result > 0 — the widget placeholder is present.
6) Troubleshooting & common issues
No .nex-auction in DOM:
Confirm you edited the active/preview theme (not another theme).
Some themes render product cards via JavaScript templates — search for product-card or product-grid templates.
Try pasting the snippet into snippets/product-card.liquid or sections/collection-template.liquid if price is built elsewhere.
Wrong variant ID / blank data-attributes:
Your theme may not expose product.variants[0] in that template. Look for variant.id, product.selected_or_first_available_variant.id, or ask us and we’ll suggest the correct variable.
Layout breaks / CSS issues:
The snippet is just a div. If spacing looks off, add a minimal wrapper class or contact us for a small CSS rule to match your theme.
Liquid errors on save:
Make sure you did not accidentally remove braces or quotes. Revert to backup if needed.
7) Rollback plan
If something looks wrong:
In Edit code, open the file and click the timestamp history (top of the editor) and Revert to a previous version.
Or replace with your saved backup of the original price.liquid.
8) Publish when ready
Once verified on preview:
From Themes, choose the edited theme → Actions → Publish to make it live.
Need Help?
If you face any issues while injecting the code, don’t worry! Contact us anytime at [support@nexlerate.com] and we’ll assist you promptly.